Converting a color photograph to B&W
Someone recently requested information on how to convert a color photograph to a black and white version. As with many questions, formulating an answer depends heavily on the what the questioner brings to the moment. We've probably all been in spots where, when asked a question, we give the preliminary response: "Do you want the long answer or the short answer?"
Discussions of how to do something can become intricately detailed, but today we will go with the short answer. If you are an old hand at using photo-editing software, this quick and easy example probably will seem elementary to you. However, if you're a newcomer to this technique, or if you're using another method and you are not quite satisfied with its results, you may find that producing a black and white photograph with that certain "look" you are seeking is within reach.
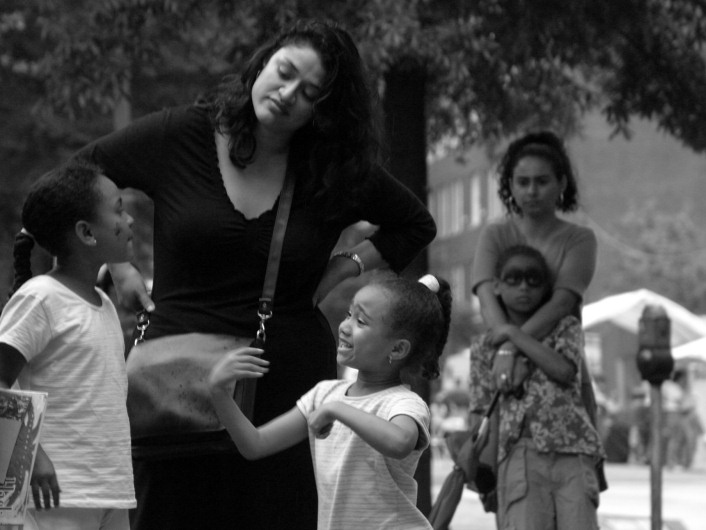
Let's begin with a color photograph.
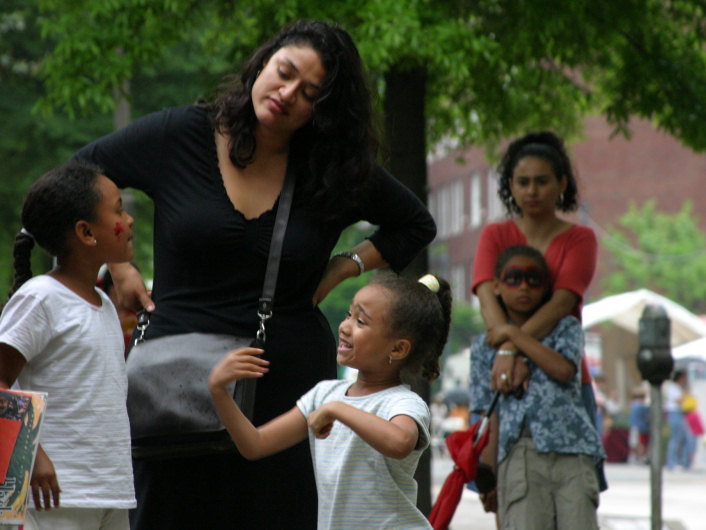
Not a bad example of candid, street photography, but the photo is not without its problems. The emphasis should be on the expressions of the people in the foreground, but the background contains some colors that distract attention away from the people. That makes the photograph a good candidate for conversion to black and white.
Digital camera buyers usually find some photo-editing software included when they unpack their cameras. When the time comes to make a black and white photo, the new camera owner opens a color photo into his photo-editing software, clicks on a command with a label such as "desaturate the photo," or "change to grayscale," and (drumroll) the result pops up on the screen as..........blah, a dull, rather lifeless version of the photo. What went wrong?
The problem is that one size does not fit all. The pre-packed settings will produce a marvelous result sometimes, but the possible range of colors in photographs makes it impossible for the same settings to do a good job with another, much different photo, or the next one, or the one after that.
The reason for this is that digital cameras produce images by blending together pixels of red, green and blue light (the additive colors) captured in a scene. Depending on the particular image, converting these separate colors to monochrome can yield very different results. Here is our original photo split into its red, green and blue channels.
Red
Green
Blue
Sometimes a single channel can stand alone as a black and white photo of reasonable quality, but usually a mixture of the channels--a mixture that is different for various photos depending on their specific differences--would be best.
Fortunately, software is available that enable us to mix the color channels. The feature to look for in a software package is aptly and conveniently named the Channel Mixer. Probably software that has a "layers" feature is also mostly to include a channel mixer. These would include Photoshop, Photoshop Elements, Paint Shop Pro, and others. Photoshop is expensive and contains many features that most photographers (unless they work as graphic designers) will never use. Fortunately, Elements and Paint Shop Pro are often available at bargain prices, and they can do the job.
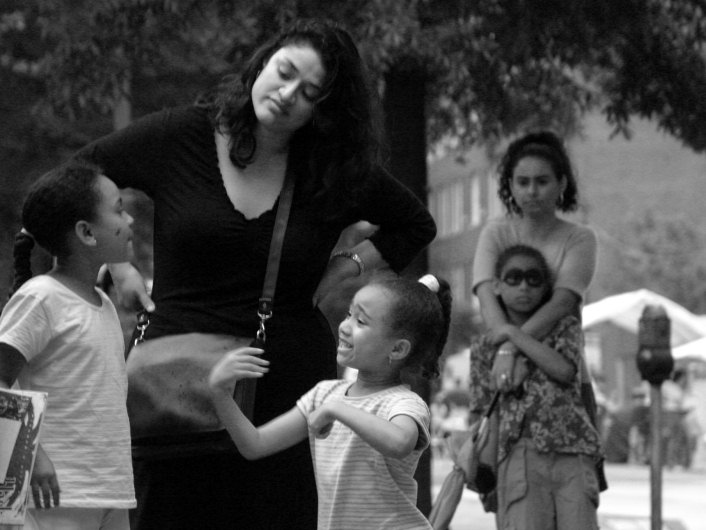
Once we can see the separate color channels, the task then becomes primarily one of looking. We inspect the RGB channels and estimate what proportion of each would work in the photo. In this case, the blue channel would appear to be of least use. It has the best contrast, but it renders large parts of the photo too dark, and too much detail is lost. The green channel is better, although it has flat look. Another characteristic of the green channel is that it makes vegetation appear lighter than the other channels, and in this photograph we want to draw the viewer's attention to the faces and away from the leaves of the trees in the background. The red channel looks promising, although it has brightened the skin tones slightly too much so that detail and character are lost. Another small problem with the red channel is that it has made the brick building in the background a bit lighter than we would like for our purposes with this photo.
What mixture to use? Clearly the answer is subjective. The decision in this case, the version below, uses 50 percent of the red, 30 percent of the green, and 20 percent of the blue.
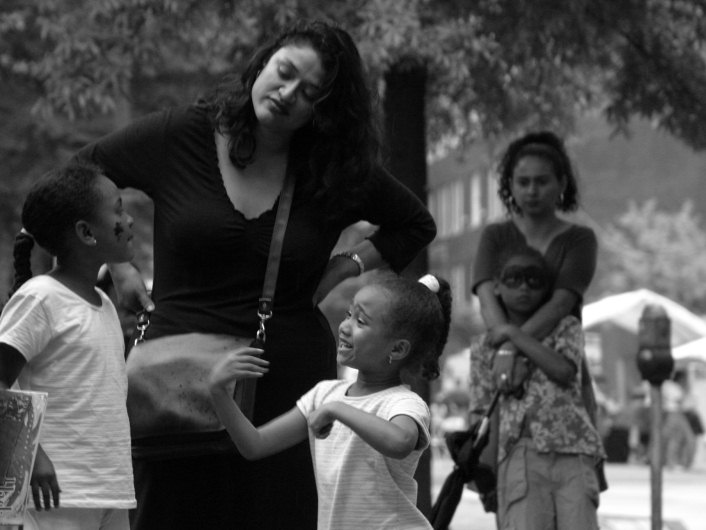
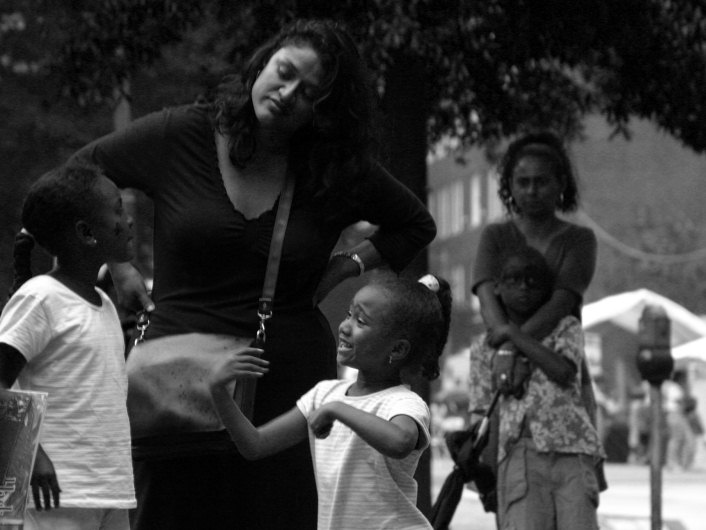
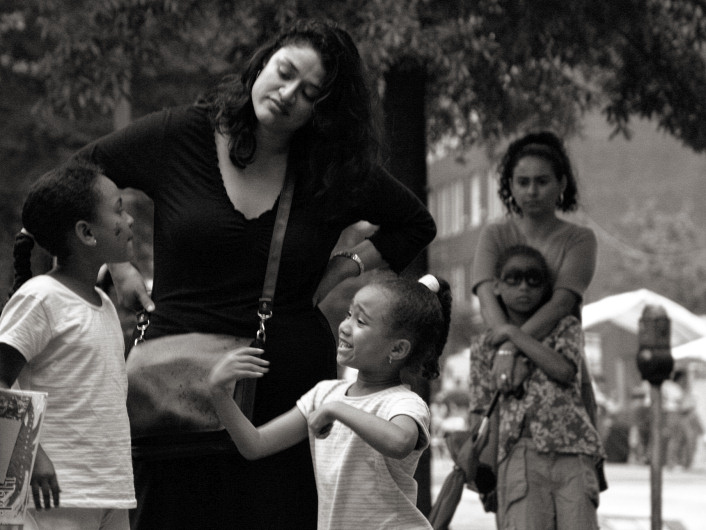
The finishing touches involve increasing the contrast, adding some tone, and sharpening the image. The final result, then, is this:
Again, all of this can be presented in greater detail, and purists probably would differ with some of the terminology and description, but if you are new to color>b&w conversion, this example should get you off to a good start. With very little practice, the technique can be applied in much less time than it takes to read the description of the technique.
You will find that photos containing a greater range of color, or more bright, highly saturated colors. will have color channels that differ from one another much more than those in this example. Also, the channel mixer has uses in addition to converting color photos to black and white. It can be used in color photos to boost some colors and reduce the intensity of others. This makes it a good tool to use to make digital photographs that mimic the characteristic appearances of different color films, including Fuji Velvia, a favorite of many photographers. But that is perhaps a subject for another day. For now, we'll step out of the digital darkroom.
posted by Jim Natale @ 8:05 AM
0 comments
![]()

0 Comments:
Post a Comment
<< Home